
Quant Connect Rollup UI
The Quant Connect Multi-Ledger Rollup UI is accessible for users with a Quant Connect account. Once logged into Quant Connect the rollup services can be found under the Quant Fusion drop down in the sidebar options. Multi-ledger Rollup Transaction Explorer and Multi-ledger Rollup Smart Contract Explorer are the two Multi-Ledger Rollup pages available.
Multi-ledger Rollup Transaction Explorer
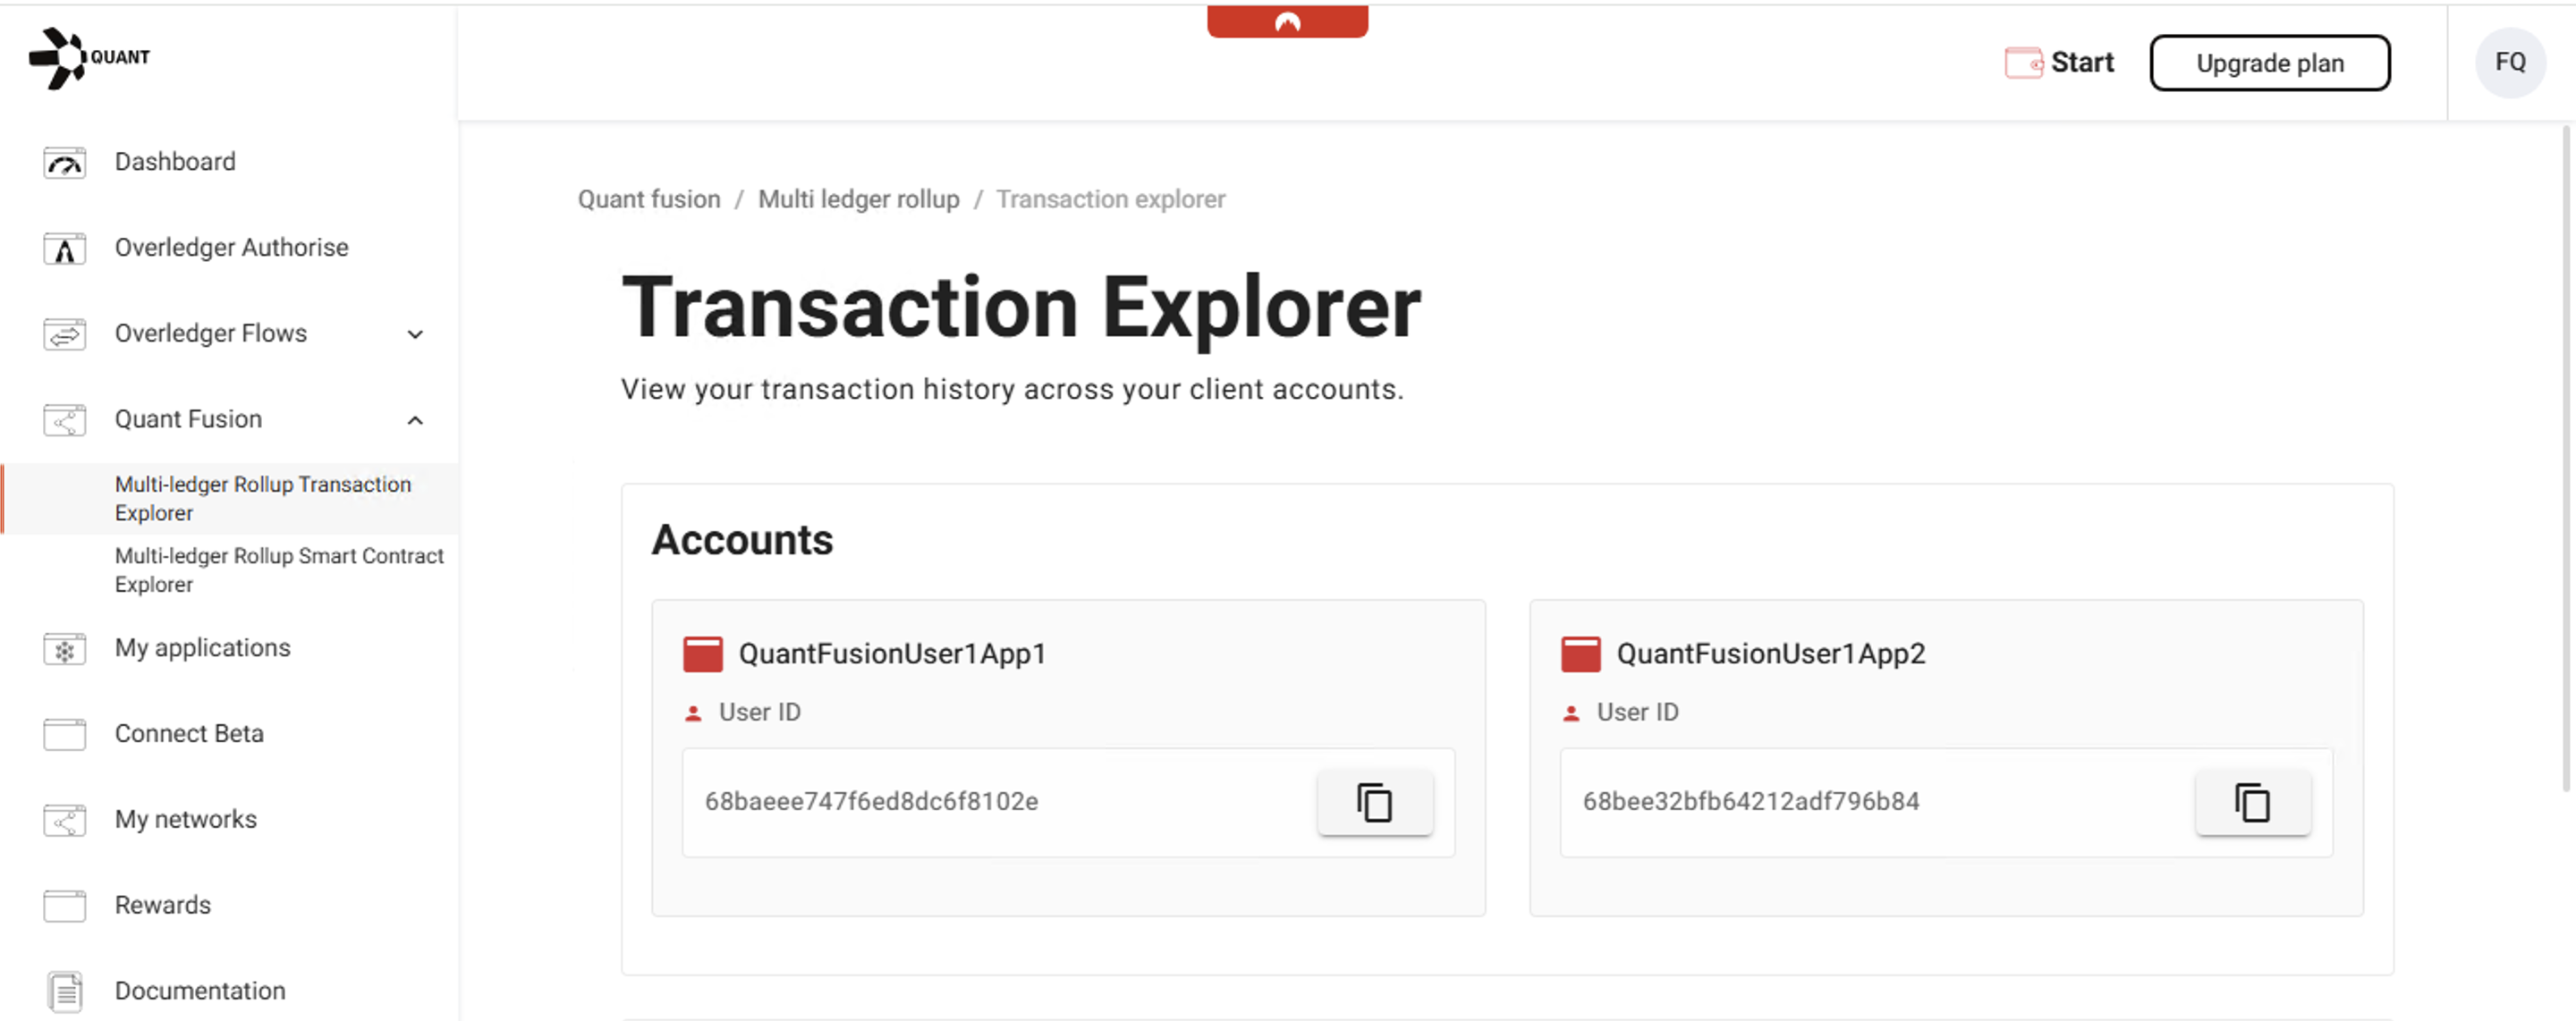
The Transaction Explorer first shows your Rollup Accounts. A Rollup Account is automatically provisioned for each Application you create in Quant Connect → My applications (also accessible from the sidebar).
How to get a Rollup Account
- Go to My Applications and create an application.
- Return to the Multi-ledger Rollup Transaction Explorer. You’ll see a new Rollup Account for that application.
Behind the scenes, your application and its Client ID are used to create the Rollup Account and assign a unique Rollup User ID.
What you’ll see on each account card
- Application name (the name you gave it)
- Rollup User ID (displayed beneath the application name)
Which ID do I use?
Rollup User ID — Use this for rollup operations and when sharing identifiers with other users (e.g., to grant access to specific smart contracts).
Client ID — DO NOT share. This, together with your Client Secret, is used for authentication and authorisation within Rollup and other Quant Connect services.
Important: Do not confuse your Client ID with your Rollup User ID.
- Client ID/Client Secret are sensitive credentials and must not be shared.
- The Rollup User ID is the safe, shareable identifier generated by the Rollup service.
See figure below:
Below the Accounts section is your Rollup transaction history which is a log of transactions linked to your rollup user IDs including operations like token transfers and smart contract deployments.

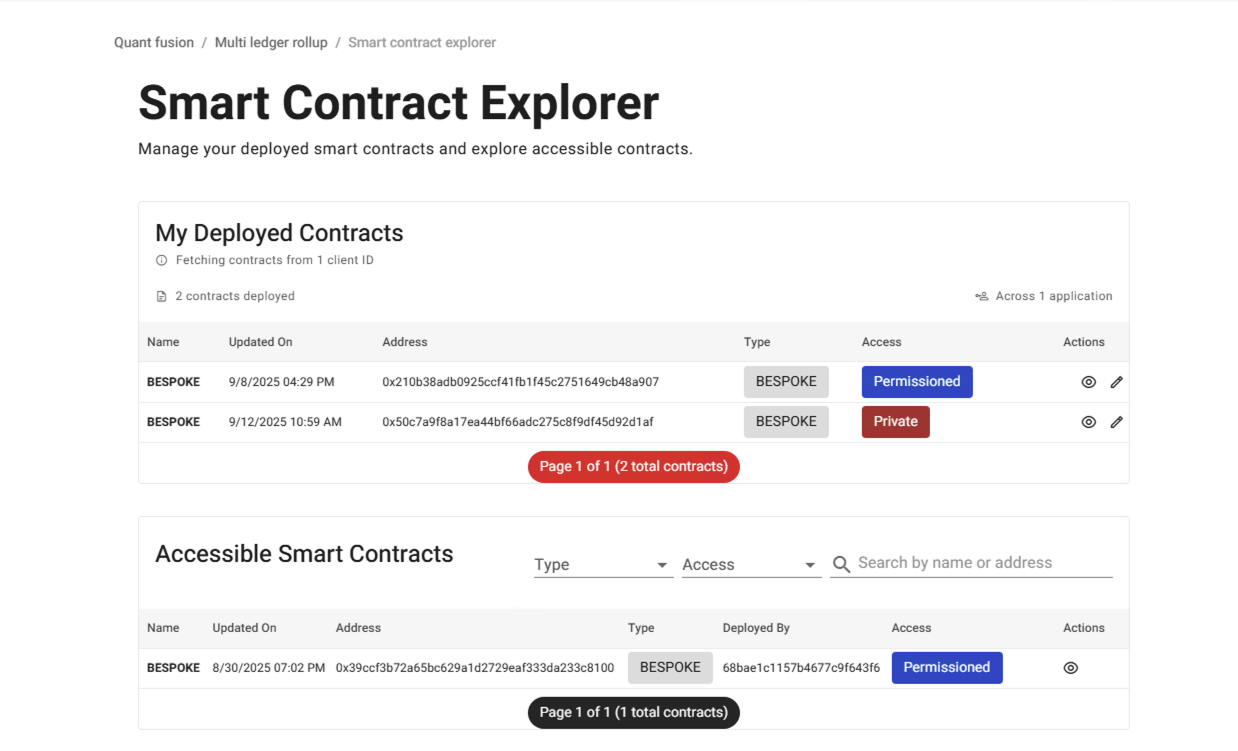
Multi-ledger Rollup Smart Contract Explorer
- My Deployed Contracts — View the smart contracts you’ve deployed and manage their permission settings (e.g., who can view or invoke them).
- Accessible Smart Contracts — See contracts deployed by other parties that you have been granted permission to interact with.
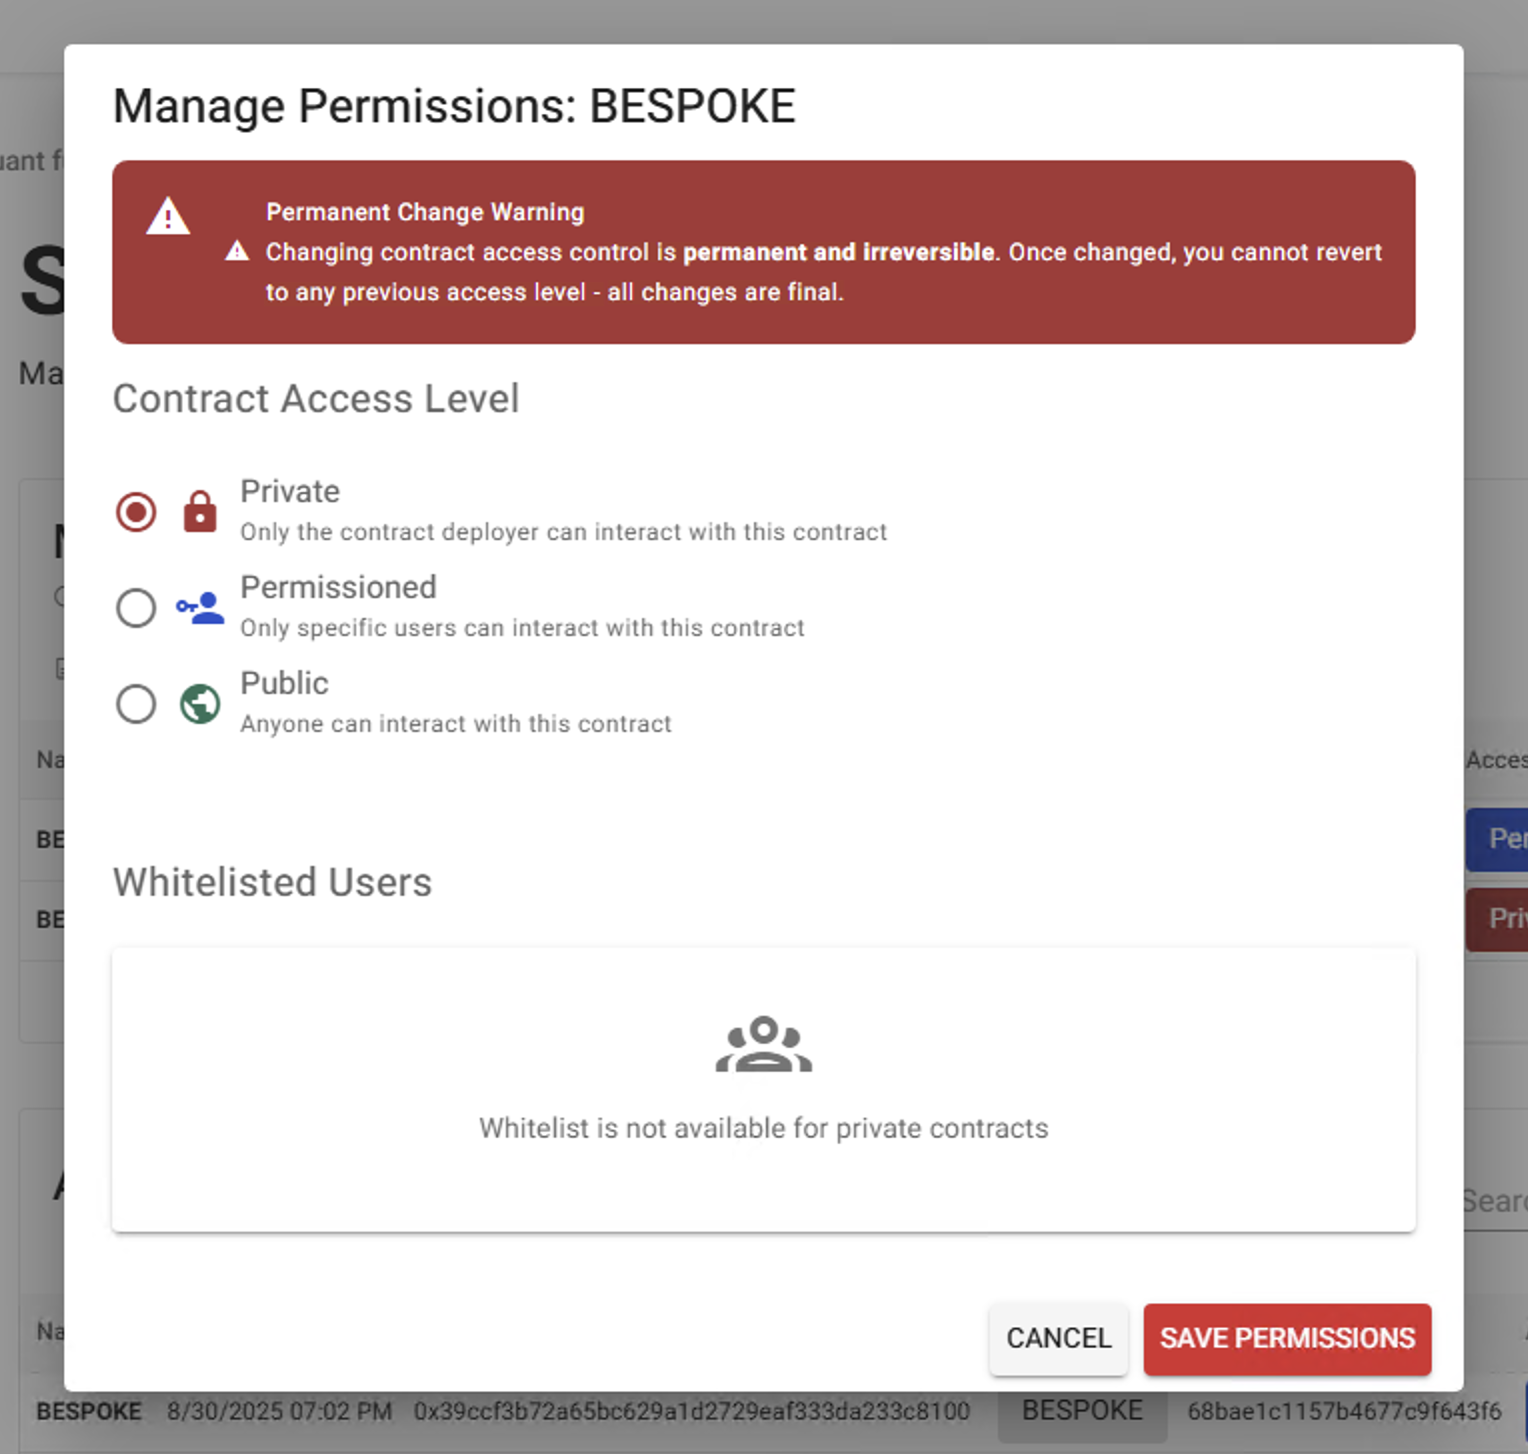
Changing Permissions:
To update a deployed contract’s permissions, click the pencil icon in the Actions column. This opens the Permissions modal for that specific contract.
Important: Permission changes are permanent and cannot be undone. Review your selection carefully before confirming.
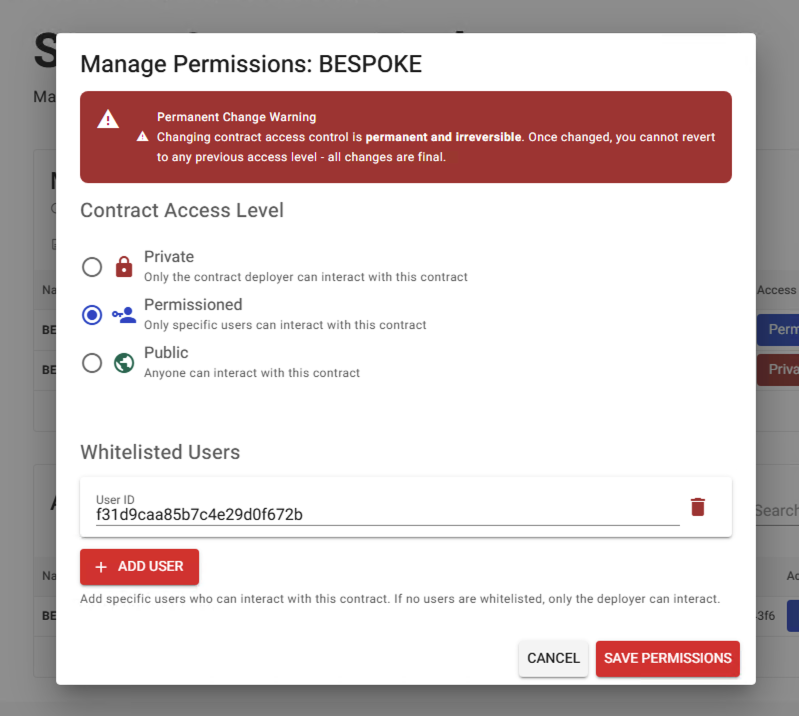
Permissioned Contracts (Allowlist):
Contracts set to Permissioned use an allowlist/whitelist. Grant or revoke access by adding or removing Rollup User IDs on that contract’s allowlist. Changes take effect immediately.
tract:
Updated 8 months ago